Wednesday, May 25, 2011

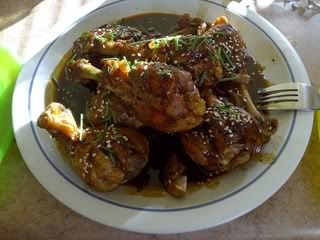
Tonight's dinner.

Brought to you by: Skinnytaste.com
I've been eyeballing these drumsticks for awhile, just been super lazy about it. Plus I HATE taking the skin off chicken. seriously. loathe it.
I bit the bullet and decided tonight was the night. Its not a bad recipe to follow. One issue it takes way longer than 8-10 min to get the glaze reduced properly. I wound up just giving up because well I was getting burned and tired of trying not to burn it. But probably took a good 15-20. Overall though taste is delicious and the chicken stays nice and moist. 2 thumbs up here.
of course you know I have a picture. Forgive me its a cell phone pic as I was too lazy to dig out my camera.
Photobucket

Friday, May 20, 2011

With the power of youtube....

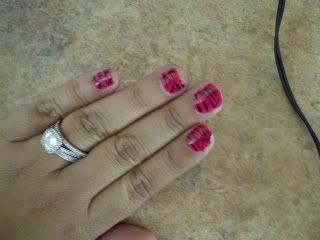
who needs to pay for a mani anymore?
Not this girl. After a few posts at my most fav forum about nails and such I started scouring youtube. It all started because of some zebra nails someone posted. I of course had to jump in on that band wagon. So originally I was going for zebra. They came out more like tiger print, but I like them none the less.
Photobucket

However next on my list is this, but only one nail I think having a full on army of faces on my fingers would freak even me out lol


Wednesday, May 18, 2011

Old in to new. Tv Tables (with tutorial).

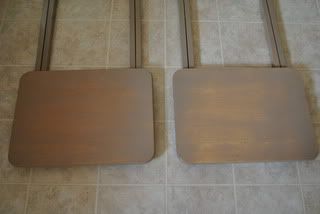
When I moved up to New Mexico my mom gave me 2 tv trays. It started out as a set of 4, but well over time ( 15 years or so) they lost 2. They are a basic honey colored wood but had lots of stripping on the top just from use. I told the hubs I wanted to paint them, originally I was just going to paint them a solid color and be done.... But what fun would that be?
A few months ago I decoupage a chair and my end table/tv stand. I thought I would do the same with these.
I decided to paint ( ok the hubs painted) the trays with Krylon spray paint Khaki color. Ok a tiny plug, and no Krylon didn't tell me to say this, Krylon has the best spray paint and super low odor after drying. Plus a nifty nozzle that you can adjust to be vertical or horizontal. Anyway commercial over. I had him just barely paint the top mostly so the the glue would stick. Ok so on to pictures and a small tutorial.

Here are the 2 tables painted and ready to go.
Photobucket

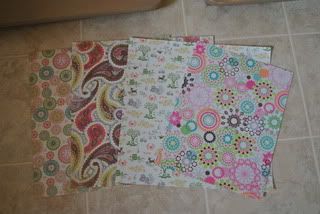
Here are the scrapbook sheets I picked up
Photobucket

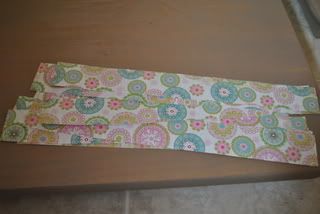
I cut them into strips, I did this freehand as I wanted them to be different sizes and shapes. You could of course make perfect squares by measuring or using a paper cutter, which I don't own.
Photobucket

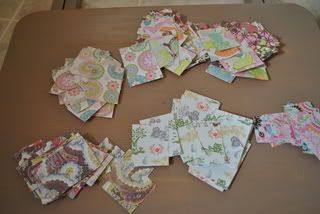
As you can see different size squares.( i had some paper from the chair project that I cut up and used as well)
Photobucket
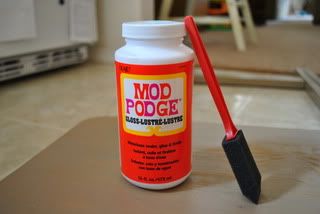
Mod Podge and a foam brush. Essential items. I got gloss, but you could also use Matte.
Photobucket

You want to work in small sections since the glue will dry quickly. Also be careful of touching the paper a lot. It can get dirty/torn especially the wetter it is.
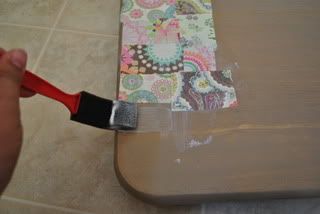
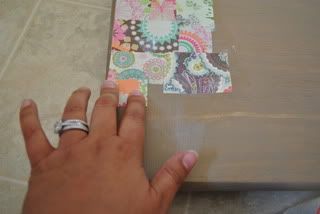
* forgive my awkwardness since I am right handed, but i can't use my left hand to shoot.* Spread the glue with your foam brush now here you can either put the paper down directly onto the glue or as I recommend put some glue on the paper to make sure the edges and corners will stick.
Photobucket

[make sure to place a layer of podge over your just placed paper ( or you can accumulate a few) to keep it in place till it dries. Sometimes skipping this step can lead to curled edges and such. ]
Photobucket

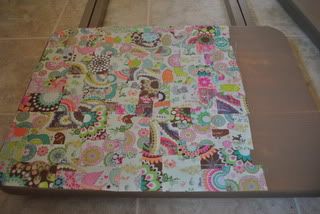
Continue working however you like. I did an overlapping pattern since my pieces weren't cut perfectly.
Photobucket

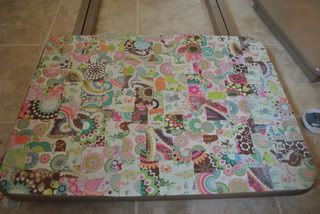
and viola. finished project.
Photobucket

*tips* Mainly if you never worked with Mod Podge, its both a glue and a sealer/finisher. When you are done with your project you simply spread a layer of podge over the top and let dry completely.
Don't use a ton of glue as it will start to make your paper soppy and can seep out the sides and create a mess. Remember to smooth any bubbles out of the paper ( not usually an issue if using small pieces like in this project but in a larger pieces can be an issue) When you put glue over the top of your project remember to use nice smooth strokes it will keep the glue from pooling or creating a weird finish, and yeah that can happen.
Its water soluble so it ( in theory) can be washed off from hands and clothes.

So total cost of this project. $21.62 ( this includes tax)
Broken down before tax:
Paint was 3.47 per can and I bought 2 cans. $6.94
Scrapbook paper large sheets were .59 per sheet I bought 7. $4.13 for all 7
Scrapbook paper small sheets were .29 per sheet I bought 4. $1.16 for the 4
Foam brushes a pack of 4, $.99
the mod podge was the big spender at $6.99 for the large bottle.
Not bad I know. Now the cost can even be lower, for instance if I could have found my other bottle of mod podge ( now MIA) and hadn't used all my brushes from my last experience that would have saved money. I also bought more paper than I actually needed ( since I had some left over from a previous project) but I know I can use it in a later project.
This is a great type of project if you want to keep costs low and just want to repurpose some old furniture you have laying around.
Let the creativity begin!!

Tuesday, May 17, 2011

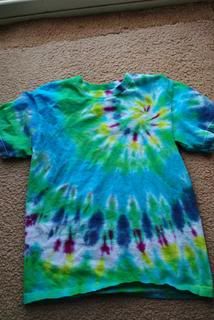
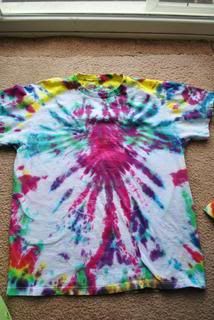
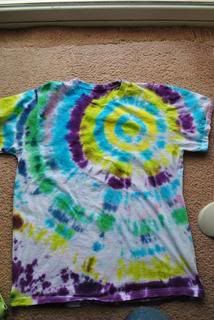
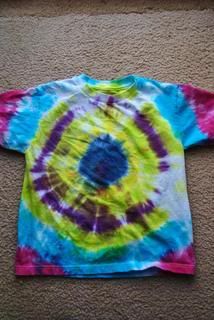
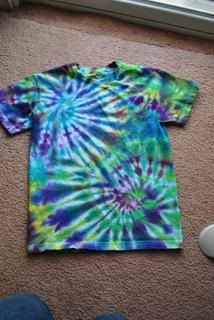
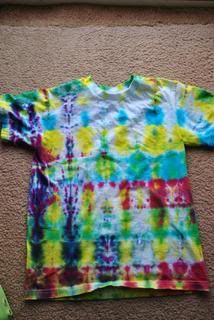
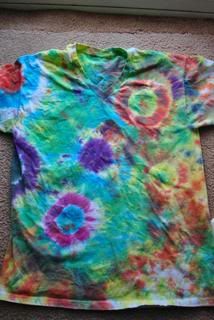
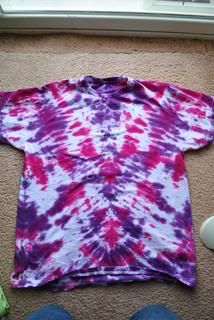
Tie dye experience second batch.

This time was much more time consuming ( my fault) but a lot better. I wound up buying about 22 shirts ( i don't know why, probs because they came in packs of 6 ugh) anyway i bought a bunch of dye so I thought well I need to dye a bunch of shirts or else it will go to waste. [more on that later]. I wound up soaking them in soda ash, even though it said it wasn't necessary, I was going to use some dye from my original batch and Tulip said that the color fades after about 45 min and this dye had been sitting under my sink for the better part of a week.. Better safe than sorry.
So with shirts soaked and my AC broken, yeah that was tons of fun, I started folding, wrapping and twisting. Most came out pretty decently. I had issues with of course the heart design, as usual, but great success with the V even though I didn't tie it but used rubber bands.
I probably should have taken more time to band them better as the bigger shirts got more areas of solid color than I really wanted. What can I say it was hot and there were tons of shirts to do and kids clamoring to get started.

As a novice I have some tips I'd like to share.

Don't get all crazy with colors, I bought a bunch of packs with tons of colors and really you can make most of them with the 3 basic colors of red ( fuchsia if you like it a bit brighter), blue ( or turquoise) and yellow. Although I totally agree with Rose that the lime green tulip makes is awesome and the first color to always go lol. Also you could wind up with contamination with splashing or drips. It also keeps you from making ugly colors you might not want in a bright shirt.

Keep your shirts away from the dye area till everything is mixed and ready to go again the contamination can be an issue. When cutting the dye pack and opening the bottles lots of dye particles got everywhere. I probably also should have changed my gloves for that reason. Since I had dye on them touch the wet shirt, well it can lead to having spots where you don't want them.

Be mindful of folds, and getting dye in there. Unless you want more white in your shirt.

make sure you have all your stuff together like your plastic bags to keep your shirts in, a bucket for holding them to wait it out, a towel or whatever you might think you need. Last thing you want to do is be searching for something while you have tons of dye on your hands.

On to the folds. Start simple. I tried the heart and failed miserably this time around. Also be mindful when you do front of shirt only folds, the back of the shirt may get a big block of solid dye and might not be the look you were going for. Easiest folds for me, the bullseye, sunbursts and mushrooms ( or as I call them nubs lol) the vertical stripes, I did a kinda full V which wasn't super hard other than the banding part ( probably should have used a string for that one). Make sure if you are doing anything that requires you to draw on the shirt to use a washable marker. I used a Crayola and it washed right out.

Be mindful of color blending. colors will run and blend. some colors don't do so well together. My son has yet to figure this part out but he likes his shirts so I guess its cool lol.

Alright on to some pictures.
This is a single swirl.
Photobucket

Photobucket

Photobucket

Photobucket

Ok I have to say I'm so glad this is my shirt because the colors are pretty freakin sweet. lol
Photobucket

My failed heart. So sad
Photobucket

Bullseyes

Photobucket

Photobucket

Photobucket

Photobucket

Photobucket

Photobucket

Sunbursts on the sides
Photobucket

The Double swirl ( a bit harder to get right than it looks)
Photobucket

Photobucket

Sometimes cool stuff happens in the folding/swirling process.
Photobucket

Vertical Stripes
Photobucket

Photobucket

My two baby onesies. bullseye
Photobucket

and swirl
Photobucket

Sunbursts and nubs/mushrooms
Photobucket

Photobucket

This one i used older dye and as you can see the colors are a bit more muted
Photobucket

A partial V.
Photobucket


This is a single swirl, but this is what turns out when you don't get dye in the folds. a bunch of white and just smidges of color.
Photobucket


Friday, May 13, 2011

Today is tie dye day!

It all started because my middle daughter was supposed to have a tie dye day at her school for movie day. Well the other second grade teachers didn't want to do it, so they aren't doing it at all. Booo hisssss, mean teachers. Anyway I figured well wth, I can do this. Did I mention I have never tie dyed in my life. Ever. Not even at girl scout camp, at a friends, in school. Never.
After a few trips to hobby lobby, returning of some dye, and an internet convo with a tie dye expert * waves at Rose HI ROSE!!!* i think i'm ready.
I am going to be using the Tulip ultimate tie dye kit.
I didn't get pics but will post with finished projects.
Overall the kit is pretty easy to use, i had an issue getting the powder from the mini ziplock bags into the bottle, but i wound up just cutting it and then folding the plastic in, shoving the end in the bottle and viola. The only other issue, 8 bottles, but 12 colors. I wound up only using 8 of the colors because I didn't feel like trying to figure out how much water I needed to make all 12 colors. It would have been easy since they have a fill line on their own bottles... Just lazy.

The colors are vibrant and the bottles are perfect for squirting and just the right size for kids hands too. Overall if this is your first time dyeing this is a really good kit to use. It has the soda ash included in the dye so no need to soak them in soda ash before hand. Just make sure the shirts are damp. Tomorrow... pictures.

Wednesday, May 11, 2011

My lone tomato plant

Has shot up overnight it seems. Just the other day I post a picture of it barely poking thru. Now its huge! ok over exaggeration, but I'm just so proud its growing.

Monday, May 9, 2011

More of what I'm growing.

Blogger only lets me upload 5 pics per post, and for some reason i can't even load all 5. *gives blogger the side eye* so here is just a small sample of things soon to go into ground if we ever get off our butts and finish the garden area. I think I mentioned in my last post how we had tons of plants going on, lots of veggies and herbs. I've already started drying some thyme to use for later, and using mint in the iced tea. super yummy. Tonight it was so nice to go outside and snip some fresh thyme, mint and cilantro without having to see if it went bad, or dig through the fridge to see if I maybe have some non spoiled/slimy herb lurking in the bottom of a veggie draw, or behind the milk. I really can't wait to move into our own house so I can keep a permanent garden.
Lavender in this pot


Sweet mint


Lemon thyme

My apologies and an update

Sorry everyone I didn't abandon my blog, merely got busy with life. We've had a lot going on lately as the school year comes to a close. We've had first confessions for all 4 kiddos, baptisms for 2, birthdays, family fights.. you know the usual.
Anyway. I'm still here, snapping pics and trying new things. We decided this year to start a garden. Tomatoes, onions, herbs, and a few flowers for fun. Lets hope it works out. I bought actual plants for tomatoes, lavender, cilantro, mint, chives and lemon thyme. I am starting dill, white onion, yellow tomato, and walla walla sweet onion, as well as zucchini and summer squash. I'm crossing my fingers hoping that things will bloom. So far so good, haven't killed anything I've bought. lol.
My garden area is blooming and I'm hoping to attract some honey bees as well. I've had some success with seed planting as some mystery seeds bloomed when all others died, and my sunflowers haven't keeled over yet. The honeysuckle I got at Lowes is going strong and I'm winding it around my trellis regularly. I think maybe my 'black thumb' has turned just a bit green. *crosses fingers* lets hope.
On to some pictures.( I'm trying to shoot manual when I shoot 'still life'. hoping to improve my skill)
These are my baby seedling dill plants.

My lone white onion

My lone yellow tomato